Category: Editorial

  • How to Fix Sound Not Working after Windows Update

    How to Fix Sound Not Working after Windows Update

    You’ve just finished installing a Windows update, hoping for new features and better security. But when you go to play a video, you’re met with silence. It’s a frustratingly common problem: a routine update accidentally breaks your audio. The good news is that in most cases, you can fix this yourself.

    This guide will walk you through the most effective solutions, starting with the simplest checks and moving to more advanced steps, to get your sound back. I’ve been a go-to person for this exact issue for friends and family for years, and it almost always comes down to a driver or a setting that Windows has inadvertently changed. Let’s get it sorted.

    First, a Few Basic Checks (Don’t Skip These!)

    Before diving into complex fixes, let’s rule out the simple stuff. It might sound obvious, but these quick checks solve the problem more often than you’d think.

    • Check Your Volume: Click the speaker icon in the bottom-right corner of your taskbar. Make sure the volume slider isn’t at zero and that the speaker icon doesn’t have an ‘X’ next to it, which indicates it’s muted.
    • Check Your Physical Connections: If you use external speakers or a headset, ensure the cables are securely plugged into the correct audio port on your computer. Try unplugging and plugging them back in.
    • Select the Correct Playback Device:
      1. Right-click the speaker icon in the taskbar.
      2. Select Open Sound settings (or Sound settings).
      3. Under the Output section, you’ll see a dropdown menu for “Choose your output device.”
      4. Make sure your desired speakers or headphones are selected. Sometimes, a Windows update can switch this to a monitor or another connected device that doesn’t have speakers.

    If these basic checks don’t work, it’s time to move on to the more technical fixes.

    Method 1: Use the Built-in Windows Audio Troubleshooter

    Windows has a built-in tool designed specifically to find and fix common audio problems automatically. This should always be your first major troubleshooting step.

    1. Right-click the speaker icon in the taskbar.
    2. Select Troubleshoot sound problems.
    3. The troubleshooter will launch and ask you to select the device you’re having issues with. Choose your speakers or headphones and click Next.
    4. Follow the on-screen instructions. The tool will check for common issues with volume settings, services, and audio drivers and attempt to fix them for you.

    Method 2: Fix Your Audio Drivers

    The most common cause for sound not working after an update is a problem with the audio driver. The update may have installed a generic driver that doesn’t work well with your specific hardware. We’ll use Device Manager for this.

    How to Open Device Manager

    Right-click on the Start Menu and select Device Manager from the list.

    Once Device Manager is open, expand the Sound, video and game controllers category. This is where your audio device (often named Realtek Audio, NVIDIA High Definition Audio, or similar) is listed.

    Option A: Roll Back the Audio Driver

    If the sound was working before the update, rolling back to the previous driver is often the quickest fix.

    1. In Device Manager, right-click on your audio device and select Properties.
    2. Go to the Driver tab.
    3. Click the Roll Back Driver button.
    4. Windows will ask for a reason. Choose an option and click Yes.
    5. If the button is grayed out, it means there isn’t a previous driver to roll back to. In that case, move to the next option.

    Option B: Update the Driver

    If rolling back isn’t an option, let’s try updating.

    1. In Device Manager, right-click on your audio device and select Update driver.
    2. Choose Search automatically for drivers. Windows will scan its database for a suitable driver.

    Option C: Manually Reinstall the Audio Driver (Most Effective)

    This is often the most reliable fix. We will completely uninstall the current driver, forcing Windows to find and reinstall a fresh one upon restart.

    1. In Device Manager, right-click on your audio device and select Uninstall device.
    2. Important: A confirmation box will appear. If you see a checkbox that says “Delete the driver software for this device,” do not check it for the first attempt. Click Uninstall.
    3. Once the device disappears from the list, restart your computer.
    4. When your computer boots back up, Windows will automatically detect the audio hardware and reinstall the driver. Check if your sound is working now.

    If that still doesn’t work, repeat Step 1 & 2, but this time, check the box to “Delete the driver software for this device” before uninstalling. Then, restart the computer. If sound is still not restored, visit the support website for your PC’s manufacturer (e.g., Dell, HP, Lenovo) or motherboard manufacturer (e.g., ASUS, MSI) to download and install the latest official audio driver for your specific model.

    Method 3: Check Windows Audio Services

    For your audio to work, certain services must be running in the background. A Windows update can sometimes stop them.

    1. Press the Windows key + R to open the Run dialog.
    2. Type services.msc and press Enter.
    3. In the Services window, scroll down and find the following two services:
      • Windows Audio
      • Windows Audio Endpoint Builder
    4. For each service, check that its Status is “Running” and its Startup Type is “Automatic.”
    5. If one isn’t running, right-click it and select Start. If the startup type is not Automatic, right-click it, select Properties, change the Startup type to Automatic, and click OK.

    Method 4: The Last Resort – Uninstall the Windows Update

    If you’ve tried everything above and are certain the Windows update caused the issue, you can uninstall it. Use this as a last resort, as it will remove any security patches included in the update.

    1. Go to Settings > Update & Security > Windows Update.
    2. Click on View update history.
    3. Click on Uninstall updates.
    4. A new window will open. Select the most recent update (check the “Installed On” date) and click the Uninstall button.
    5. Restart your PC after the process is complete.

    By working through these methods systematically, you should be able to diagnose and fix the issue and get your sound working again.

  • How to Free Up Space on Samsung Without Deleting Apps

    How to Free Up Space on Samsung Without Deleting Apps

    Running low on storage is one of the most common headaches Samsung Galaxy users face. It can slow down your phone and stop you from downloading new apps or files. The good news? You don’t have to delete your favorite apps to reclaim space. By targeting media, cached data, downloads, and unnecessary files, you can free up a surprising amount of storage. Here’s how.

    Why Your Samsung Phone Runs Out of Space

    Even if your phone has decent storage, it fills up fast because of:

    • High-resolution photos and videos: Especially 4K videos that eat tons of space.
    • App data and cache: Apps build up temporary files and data over time.
    • Downloads: Files saved from browsers, chats, and emails.
    • System files and updates: Android and Samsung updates take space too.

    How to Free Up Space Without Deleting Apps

    Focus on these areas to clear storage while keeping your apps intact.

    Method 1: Clear App Cache

    Cache files help apps run faster but can pile up. Clearing cache is safe—it won’t delete your personal data or logins.

    1. Open Settings > Apps.
    2. Select an app (big ones like Chrome, Instagram, or Spotify tend to cache a lot).
    3. Tap Storage > Clear cache.
    4. Repeat for other apps as needed.

    Pro Tip: You can clear cache for all apps at once via Settings > Device care > Storage > Clean now under Temporary files—but targeting big caches individually often helps more.

    Method 2: Move Photos and Videos to SD Card or Cloud

    Media usually takes the most space.

    1. Move to SD Card:
    1. Insert and format your SD card as portable storage.
    2. Open My Files > Internal storage.
    3. Navigate to folders like DCIM, Downloads, Pictures.
    4. Select files or folders > tap Move > choose your SD card > Move here.
    5. Set your Camera app to save future photos/videos to the SD card in its settings.
    1. Use Cloud Storage:
    • Google Photos: Enable Backup & sync, then use Free up space to delete local copies after backup.
    • Samsung Cloud: Sync photos via Settings > Accounts and backup > Samsung Cloud, then manually delete from Gallery after confirming backup.
    • OneDrive: Use Microsoft’s app with camera upload enabled, then delete local files once uploaded.

    Method 3: Clear Downloaded Files

    Downloads often get forgotten but can pile up quickly.

    1. Open My Files > Downloads.
    2. Review and delete unwanted files.
    3. Also check other folders like Documents for clutter.

    Method 4: Delete Unused APK Files

    If you sideload apps, APK files might still be lurking.

    1. Open My Files > Installation files or APKs.
    2. Delete any APKs you no longer need.

    Method 5: Clear Messaging App Storage

    Messaging apps like WhatsApp or Telegram store lots of media outside chats.

    1. Open My Files > Internal storage > find WhatsApp or Telegram folders.
    2. Go to Media subfolders and delete old images, videos, audio.
    3. Use in-app storage managers (e.g., WhatsApp’s Settings > Storage and Data > Manage storage) to clear large files.

    Method 6: Use Device Care to Optimize Storage

    Samsung’s Device Care gives an overview and cleaning options.

    1. Go to Settings > Device care > Storage.
    2. Tap Clean now to remove temporary files and recycle bin items.
    3. Check sections like “Similar images,” “Large files,” and “Unused apps” for quick cleanup ideas.

    Method 7: Disable or Sleep Unused Apps

    If you can’t delete pre-installed apps or want to save resources:

    • Disable apps:
      Settings > Apps > select app > tap Disable if available.
    • Put apps to sleep:
      Settings > Device care > Battery > Background usage limits > enable Put unused apps to sleep and add apps to Deep sleeping apps for stronger restrictions.

    By regularly using these methods, you can clear space on your Samsung Galaxy without losing apps, keeping your device running smoothly and ready for new content.

  • How to Sync Samsung Phone with Windows PC

    How to Sync Samsung Phone with Windows PC

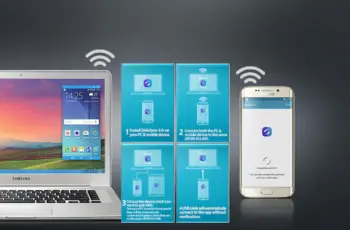
    Connecting your Samsung phone to your Windows PC can make life a whole lot easier. From transferring files to managing notifications, syncing your devices lets you move fluidly between mobile and desktop tasks. Here’s how to do it.

    Why Sync Your Samsung Phone with Your Windows PC?

    • Easy File Transfers
    • Backups
    • Productivity Boost: Texts, calls, notifications—all on your desktop.
    • Big-Screen Access: Edit docs, view media, manage content.
    • App Integration: Use some Android apps right from your PC.

    Method 1: Phone Link (Formerly Your Phone App)

    On Your Samsung Phone:

    1. Swipe down > tap Link to Windows or go to Settings > Connected devices > Link to Windows.
    2. Sign in with your Microsoft account.
    3. Follow prompts to grant permissions.

    On Your Windows PC:

    1. Open Phone Link from Start menu.
    2. Select Android as your device type.
    3. Click Pair with QR code or manually.
    4. Grant permissions to sync photos, calls, messages, etc.
    5. Features:
      • Browse/send messages
      • View photos
      • Make/receive calls
      • Access phone notifications
      • Mirror and use mobile apps (select Samsung models)

    Method 2: Samsung Smart Switch (Backup & Restore)

    1. Download Smart Switch for Windows: samsung.com/global/download/smartswitchwin/
    2. Install and open it.
    3. Connect phone via USB.
    4. Grant access and choose Transferring files (MTP).
    5. Use Smart Switch to:
      • Backup phone data
      • Restore previous backups
      • Sync with Outlook

    Method 3: File Transfer via USB (Drag and Drop)

    1. Connect your Samsung phone via USB.
    2. Tap the USB notification > Select Transferring files (MTP).
    3. On your PC, open File Explorer.
    4. Access your phone under “This PC.”
    5. Transfer files between folders (e.g., DCIM for photos, Downloads, Documents).

    Method 4: Cloud Services (Google Drive, OneDrive, Dropbox)

    1. Install the cloud app on both phone and PC.
    2. Sign in with the same account.
    3. Upload files from your phone (Gallery, My Files > Share > Upload to Drive/OneDrive).
    4. Access them from your PC’s cloud folder or website.
    5. Set up auto-backup for media if supported.

    Troubleshooting Tips

    • USB not working? Try a different cable or port; confirm MTP mode.
    • Phone Link issues? Ensure same Microsoft account and active internet on both devices.
    • Missing permissions? Go back into app settings to allow access.

    By using any (or all) of these methods, you can keep your Samsung phone and Windows PC in sync—making it easier to stay connected, productive, and backed up.

  • How to Reset App Preferences on Samsung Galaxy

    How to Reset App Preferences on Samsung Galaxy

    Over time, your Samsung Galaxy device tends to collect a surprising number of app preferences. We’re talking about everything from default apps for opening links or playing videos, to notification tweaks, permission settings, background data rules—you name it. And while these preferences usually help tailor your phone to your habits, sometimes they get tangled or start causing unexpected behavior. Maybe things just feel off. In such cases, resetting app preferences can be a quiet little fix that spares you the hassle of a full factory reset.

    Why You Might Want to Reset App Preferences

    There are a few common (and frustrating) reasons why this reset could help:

    • Apps keep crashing or glitching out: If one app—or several—starts behaving unpredictably, a reset might untangle some unseen conflict.
    • You accidentally chose the wrong default app: Like setting a browser or music player, and now it opens everything. Annoying? Yes. Fixable? Absolutely.
    • Some apps are mysteriously missing or grayed out: They might be disabled. This reset re-enables all apps.
    • Notifications gone rogue: Maybe some apps don’t alert you anymore. Resetting could return them to normal.
    • Permissions got out of whack: If apps suddenly stop accessing things they used to (like the camera or contacts), permissions might be the issue.
    • Background activity seems broken: Some apps might stop syncing or updating properly—this reset lifts any background restrictions.

    What Exactly Gets Reset (and What Doesn’t)

    Let’s be clear—this isn’t a nuclear option. Resetting app preferences does not wipe your personal data, like photos or chat histories. It’s more of a targeted cleanup. Here’s what gets rolled back:

    • Disabled apps will be re-enabled.
    • Default apps (for browsing, messaging, etc.) get cleared. You’ll be prompted to choose again when needed.
    • Notification settings for all apps go back to default.
    • Background data restrictions are removed.
    • Permission restrictions get reset, meaning apps will ask again when they need access.
    • Battery optimization settings might be reset for some apps.

    The How-To: Step-by-Step Instructions

    1. Open the Settings App
      • Swipe down from the top and tap the gear icon, or just find “Settings” in your app drawer.
    2. Go to “Apps”
      • Scroll until you see “Apps” (could also be labeled “Applications” or something similar depending on your software version).
    3. Tap More Options
      • Look for the three vertical dots (or sometimes three horizontal lines) in the top right corner. Tap that.
    4. Select “Reset App Preferences”
      • From the dropdown, tap “Reset app preferences.” In some newer phones, you may need to go into a sub-menu like “Reset settings” first.
    5. Confirm the Action
      • A pop-up will explain what will be reset. Read it over (it’s always a good idea) and tap “Reset” to confirm.

    After You’ve Reset

    • Restart your phone: It’s not mandatory, but it helps make sure everything resets cleanly.
    • Pick your defaults again: Next time you tap a link or play a song, your phone will ask which app to use.
    • Adjust notifications if needed: You might need to redo custom notification settings.
    • Re-grant permissions: Apps may prompt you again next time they need camera, location, or other access.

    Other Handy Fixes (If Reset Isn’t Enough)

    • Clear Cache or Data for a single app:
      • Go to Settings > Apps > [App Name] > Storage. Tap “Clear cache” or “Clear data” (the latter erases user data).
    • Force Stop an App:
      • Same screen: Settings > Apps > [App Name] > “Force stop” to immediately end the app process.
    • Re-enable Disabled Apps:
      • Go to Settings > Apps, scroll or filter for disabled apps, then tap and hit “Enable.”

    A Quick Personal Take

    One time, I was stuck in a weird loop where every link opened in some clunky browser I hadn’t used in years. I couldn’t shake it. Clearing defaults didn’t help. So, I finally tried resetting app preferences. It worked. Sure, a couple of unused apps got re-enabled, but I just disabled them again—no big deal. And just like that, Chrome popped up as an option again. Sometimes, it really is the simple fixes that make the most difference.

    Final Thoughts

    Resetting app preferences on a Samsung Galaxy can feel like a bit of a hidden gem. It’s quick, low-risk, and often clears up a host of nagging app issues. The best part? It leaves your personal data completely untouched. If things on your phone just aren’t behaving quite right, it’s a solid place to start.

  • How to Move Apps to SD card on Samsung

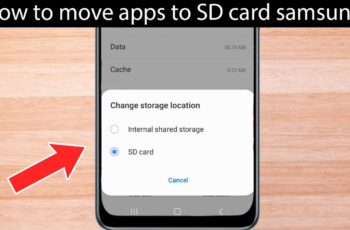
    How to Move Apps to SD card on Samsung

    Storage on smartphones can run out fast. With apps, high-res photos, and large video files piling up, freeing up space becomes essential. If your Samsung Galaxy device has an SD card slot, you might think moving apps to the SD card is the solution. This guide explains exactly what is possible today and how to manage your storage effectively.

    Understanding the Limits of Moving Apps to SD Card

    Modern Samsung phones running Android 6.0 and above (including the latest One UI) come with limitations:

    • Apps can’t always be moved: Many apps, especially system and popular third-party apps, don’t support this.
    • Samsung doesn’t support Adoptable Storage: Unlike stock Android, Samsung keeps internal and external storage separate.
    • Only parts of apps move: Even when allowed, only parts of the app (like cache or media files) move to SD.

    Step-by-Step: How to Move Apps to SD Card (If Possible)

    Step 1: Check if the App Supports Moving

    1. Open Settings > Apps.
    2. Tap on an app.
    3. Go to Storage.
    4. If you see a “Change” button under “Storage used,” the app can be moved.

    Step 2: Move the App

    1. Tap “Change” > Select SD Card.
    2. Tap “Move.”
    3. Wait for the transfer to finish.

    Note: Most apps cannot be moved. Apps that support it may still store core files internally.

    Best Alternatives to Free Up Space

    Method 1: Move Media Files to SD Card

    1. Open My Files app.
    2. Go to Internal Storage > select folders like DCIM, Downloads, or Pictures.
    3. Long press files > Tap Move > Choose SD card > Tap Move here.

    Method 2: Set Camera to Save to SD Card

    1. Open Camera > Tap Settings.
    2. Look for Storage Location > Set to SD Card.

    Method 3: Use Storage Cleaner

    1. Go to Settings > Device care > Storage.
    2. Use tools like:
      • Clean now
      • Large files, Duplicate files
      • Trash

    Method 4: Clear Cache and Data

    1. Open Settings > Apps.
    2. Select an app > Storage.
    3. Tap Clear Cache or Clear Data (be cautious, clears app content).

    Method 5: Uninstall Unused Apps

    1. Go to Settings > Apps.
    2. Sort or scroll through rarely used apps.
    3. Tap > Uninstall.

    Tips When Using an SD Card

    • Use High-Speed Cards: Opt for Class 10 or UHS-I (U1/U3) cards for performance.
    • Backup Regularly: SD cards can fail unexpectedly.
    • Don’t Remove Without Unmounting: Apps stored on the card will break if removed improperly.
    • Be Wary of Formatting: Formatting wipes all data—always back up first.

    While you can’t fully move most apps to an SD card on Samsung phones, using your SD card for photos, videos, and file storage can drastically improve internal storage space.

  • How to Make Aesthetic TikTok Edits on Phone

    How to Make Aesthetic TikTok Edits on Phone

    Creating aesthetic TikTok edits on your phone can greatly improve your content quality and attract more viewers. Aesthetic edits help your videos stand out with smooth transitions, pleasing visuals, and on-trend effects. Whether you’re new to TikTok editing or want to improve your skills, this guide covers everything you need to know — from planning your video to finalizing and uploading it — all using just your smartphone.

    What Does “Aesthetic” Mean in TikTok Edits?

    In TikTok, aesthetic edits focus on visually appealing, harmonious content. This involves consistent color grading, smooth cuts, trendy effects, and often syncing visuals with music beats. The goal is to create videos that feel cohesive and pleasing to watch.

    Step 1: Plan Your Content and Style

    Before shooting or editing, decide on your video’s theme and style. Consider:

    • Color Palette: Soft pastels, warm tones, or monochrome? Consistency matters.
    • Music Choice: Pick a trending or mood-appropriate song.
    • Transitions: Think about how scenes will flow—quick cuts, fade-ins, or zooms.
    • Visual Effects: Light leaks, VHS effects, or glitch edits can add style.

    Planning helps keep your edits focused and polished.

    Step 2: Shoot Good Quality Footage

    Even the best edits struggle if the footage is poor. Tips for shooting:

    • Use natural light or ring lights to improve brightness.
    • Shoot in high resolution and stable settings.
    • Capture multiple takes and angles for editing options.
    • Keep your phone steady or use a tripod.

    Quality footage is the base for great edits.

    Step 3: Choose the Right Editing Apps

    While TikTok offers built-in editing tools, dedicated apps provide more control. Some popular free or low-cost apps include:

    • CapCut: TikTok’s official editor, ideal for transitions, effects, and syncing.
    • InShot: User-friendly with filters, speed control, and text options.
    • VN Video Editor: Powerful editing with multi-layer timelines and effects.
    • Adobe Premiere Rush: Professional-grade tools for color correction and audio.

    I personally use CapCut for quick TikTok edits due to its seamless integration.

    Step 4: Import Footage and Music to Your Editing App

    1. Open your chosen app.
    2. Create a new project and import your recorded clips.
    3. Add your selected music track. Most apps let you trim or loop music.

    Always use music that fits your theme and preferably trending on TikTok for more visibility.

    Step 5: Trim and Arrange Clips

    • Cut unnecessary parts to keep the video engaging.
    • Arrange clips in the desired sequence.
    • Keep the total video length within TikTok’s limits (usually 15-60 seconds).
    • Focus on timing cuts to the beat of the music for a dynamic feel.

    Step 6: Add Smooth Transitions

    Transitions improve flow between clips. Common aesthetic transitions include:

    • Fade In/Out: Gentle dissolves between scenes.
    • Slide or Swipe: Moving clips in or out of the frame.
    • Zoom: Close-ups or zoom-outs for dramatic effect.
    • Speed Ramping: Slowing or speeding clips briefly.

    Most editing apps have built-in transition effects. Use them sparingly to maintain smoothness.

    Step 7: Apply Color Grading and Filters

    Color consistency creates an aesthetic vibe.

    • Adjust brightness, contrast, and saturation.
    • Use filters matching your chosen palette.
    • Apps like CapCut and VN offer LUTs (color profiles) for cinematic looks.

    Avoid over-saturating or extreme filters, which can appear unprofessional.

    Step 8: Add Text, Stickers, and Effects

    Text overlays can add context or humor. For aesthetics:

    • Use simple fonts and minimal text.
    • Position text strategically to avoid clutter.
    • Add subtle effects like light leaks, grain, or lens flares for style.
    • Avoid too many stickers or animated emojis unless it suits your theme.

    Step 9: Fine-Tune Audio

    • Adjust music volume relative to any voice or ambient sound.
    • Use fade-in/out audio transitions for smoothness.
    • Sync audio beats with visual cuts for impact.

    Audio is as important as visuals in engaging viewers.

    Step 10: Export and Upload to TikTok

    • Export your video in high resolution (1080p preferred).
    • Save to your phone gallery.
    • Open TikTok, tap the + icon, and upload the edited video.
    • Add captions, hashtags, and cover thumbnails.
    • Post at optimal times for your audience.

    Troubleshooting Common TikTok Editing Issues

    • Video too large to upload: Compress using apps like Video Compressor or reduce resolution.
    • Music syncing off: Use app timeline markers or manual adjustment tools.
    • App crashes: Clear cache or update the app.
    • Quality loss: Export at the highest possible quality, avoid multiple re-encodes.

    My Experience Making Aesthetic TikTok Edits

    When I first started, I used TikTok’s built-in editor but switched to CapCut for better control over transitions and color. Planning music beats before cutting clips improved flow drastically. I found that less is more—simple cuts and consistent color make the video feel professional. Syncing clips to music beats makes videos more engaging. Experimenting with filters helped me develop a unique style.

    Tips to Improve Your TikTok Edits

    • Follow trending TikTok challenges and editing styles for inspiration.
    • Watch popular creators to analyze their editing techniques.
    • Keep experimenting with new apps and effects.
    • Practice makes perfect—edit regularly.
    • Engage with your audience through comments to learn what they enjoy.

    Conclusion

    Making aesthetic TikTok edits on phone is about combining good footage, thoughtful planning, and careful editing. Using apps like CapCut, trimming to music beats, applying consistent color grading, and adding subtle effects will help your videos stand out. With practice, your edits will become smoother and more engaging, helping grow your TikTok presence.

  • How to Add a Q&A Feature to Your TikTok Profile

    How to Add a Q&A Feature to Your TikTok Profile

    Adding a Q&A feature to your TikTok profile enhances audience engagement by allowing followers to ask questions directly. This feature facilitates better interaction and helps creators address their audience’s curiosities effectively. Here’s a comprehensive guide on how to enable and utilize the Q&A feature on your TikTok profile.

    Understanding TikTok’s Q&A Feature

    The Q&A feature on TikTok allows creators to receive questions from their audience, which can be answered through text or video responses. This feature is beneficial for:

    • Engaging with followers: Answering questions helps build a stronger connection with your audience.
    • Content creation: Questions can serve as prompts for new content ideas.
    • Providing clarity: Addressing common queries can help clarify your content or niche.

    Eligibility Criteria

    Before enabling the Q&A feature, ensure you meet the following requirements:

    • Creator Account: You must switch to a Creator Account if you haven’t already.
    • Age Requirement: Users must be at least 18 years old.
    • App Version: Ensure your TikTok app is updated to the latest version.

    Step-by-Step Guide to Enable Q&A on TikTok

    1. Switch to a Creator Account

    If you’re not already using a Creator Account, follow these steps:

    • Open TikTok App: Launch the TikTok app on your device.
    • Go to Profile: Tap on the ‘Profile’ icon at the bottom right corner.
    • Access Settings: Tap the three horizontal lines (menu) at the top right corner.
    • Manage Account: Select ‘Manage account’.
    • Switch to Creator Account: Tap on ‘Switch to Pro Account’ and choose ‘Creator’. Follow the prompts to complete the setup.
    1. Enable Q&A Feature

    Once you have a Creator Account:

    • Access Creator Tools: From your profile, tap the three horizontal lines and select ‘Creator tools’.
    • Select Q&A: In the Creator tools menu, tap on ‘Q&A’.
    • Turn On Q&A: Tap ‘Turn on Q&A’ to activate the feature.

    After enabling, a Q&A icon will appear on your profile, allowing followers to submit questions.

    Managing and Responding to Questions

    Accessing Questions

    To view questions submitted by your followers:

    • Go to Profile: Tap on your profile icon.
    • Tap Q&A Icon: Select the Q&A icon to view all submitted questions.

    Responding to Questions

    You can respond to questions in two ways:

    • Text Response: Type your answer directly and post it.
    • Video Response: Record a video addressing the question. The question will appear as a sticker in your video.

    Responding via video can make your answers more engaging and personal.

    Tips for Effective Use of Q&A Feature

    • Prompt Responses: Timely answers keep your audience engaged.
    • Highlight Popular Questions: Address frequently asked questions to provide clarity to a broader audience.
    • Use Questions as Content Ideas: Transform interesting questions into full-fledged content pieces.
    • Maintain Professionalism: Ensure your responses align with your brand and are respectful.

    Troubleshooting Common Issues

    Q&A Feature Not Visible

    If you don’t see the Q&A option:

    • Check Account Type: Ensure you’re using a Creator Account.
    • Update App: Make sure your TikTok app is updated to the latest version.
    • Regional Availability: The feature may not be available in all regions.

    Q&A Icon Missing from Profile

    If the Q&A icon disappears:

    • Re-enable Q&A: Go to ‘Creator tools’ > ‘Q&A’ and ensure it’s turned on.
    • App Glitches: Restart the app or reinstall if necessary.
    • Contact Support: If issues persist, reach out to TikTok support for assistance.

    Conclusion

    The Q&A feature on TikTok is a valuable tool for creators to engage with their audience, provide clarity, and generate new content ideas. By following the steps outlined above, you can effectively enable and utilize this feature to enhance your TikTok presence.

  • How to Report Fake Accounts on Instagram

    How to Report Fake Accounts on Instagram

    Fake accounts are one of the most common issues on social media platforms like Instagram. These accounts can impersonate real people, brands, or public figures, and are often used to scam, spread misinformation, or steal personal content. If you’ve ever come across an account pretending to be you or someone else, it’s important to take action.

    In this step-by-step guide, I’ll walk you through how to report fake accounts on Instagram, based on verified practices from Instagram’s Help Center and real user experiences from Reddit and Quora. This article is meant for anyone—whether you’re an everyday user, a business owner, or an influencer—who needs to protect their identity or report suspicious behavior on the platform.

    Why Reporting Fake Accounts Matters

    Fake Instagram accounts can:

    • Steal your identity and images.
    • Scam your followers by pretending to be you.
    • Damage your reputation by spreading false content.
    • Violate Instagram’s Community Guidelines and Terms of Use.

    Reporting these accounts helps Instagram remove them and prevent further harm to the community.

    Signs of a Fake Instagram Account

    Before reporting, check for these common signs of impersonation:

    • Uses your name, photos, or bio without permission.
    • Has no original content or just a few random posts.
    • Sends suspicious DMs asking for money or links.
    • Follows hundreds of people but has very few followers.
    • Tags you or your friends in strange giveaway or crypto promotions.

    If any of these sound familiar, you’re likely dealing with a fake profile.

    How to Report a Fake Account on Instagram (Mobile App)

    Follow these steps directly in the Instagram app:

    Step 1: Go to the Impersonating Profile

    Open Instagram and search for the fake account. Tap their profile to open it.

    Step 2: Tap the Three-Dot Menu

    In the top right corner of their profile, tap the three vertical dots (⋮).

    Step 3: Select “Report”

    A menu will appear. Choose “Report”.

    Step 4: Choose “Report Account”

    From the options, select Report account” > then choose “It’s pretending to be someone else.”

    Step 5: Indicate Who Is Being Impersonated

    You’ll see multiple choices like:

    • Me
    • Someone I know
    • A celebrity or public figure

    Choose the appropriate option based on the situation.

    Step 6: Submit Your Report

    Instagram will log your report and begin a review. You’ll get a notification once they’ve taken action, although Instagram doesn’t always provide a timeline.

    How to Report a Fake Instagram Account (Desktop)

    If you prefer using a browser:

    1. Go to the fake profile on Instagram.com.
    2. Click the three-dot icon next to the username.
    3. Select “Report user.”
    4. Choose “They’re pretending to be someone else.”
    5. Confirm your identity or the person being impersonated.
    6. Submit the report.

    How to Report an Instagram Impersonation Without an Account

    If you don’t have an Instagram account, or you’re reporting for someone else, you can still file a complaint using Instagram’s impersonation form.

    Here’s how:

    1. Visit Instagram
    2. Choose who’s being impersonated:
      • Yourself
      • Someone you represent (e.g., client, family member)
    3. Fill in your name, email, and impersonated account details.
    4. Upload a government-issued ID to verify your identity.
    5. Describe the situation briefly.
    6. Submit the form.

    This is Instagram’s official route for non-users or users locked out due to impersonation.

    Reporting Impersonation of a Business or Brand

    If you represent a business or public brand, follow these additional tips:

    • Report via the impersonation form and attach:
      • A copy of your government ID (if applicable).
      • A utility bill or legal document proving your ownership of the brand or trademark.
    • Consider consulting a legal team if the impersonation includes trademark violations or is being used to scam customers.

    What Happens After You Report?

    • Instagram reviews reports manually.
    • If the account violates the platform’s impersonation policies, it will be disabled.
    • You may or may not receive a notification. Sometimes the account disappears without confirmation.
    • If Instagram determines the report was invalid, the account will remain active.

    What If Instagram Doesn’t Remove the Fake Account?

    If your report doesn’t result in removal, try the following:

    • Get more people to report it. Ask friends, colleagues, or followers to also report the account.
    • Submit the impersonation form again, especially if new evidence has emerged.
    • Tag Instagram’s official support accounts (like @instagram or @creators) in posts (only when appropriate).
    • Switch to a professional account and apply for verification to reduce future impersonations.

    How to Protect Yourself from Fake Accounts

    Being proactive is key. Here’s what I do:

    • I run a Google search of my name and images every few months to check for impersonators.
    • I’ve enabled two-factor authentication on Instagram.
    • I keep my personal profile information private and never post sensitive data like IDs or location.
    • I apply for Instagram verification if I meet the criteria, which helps followers identify the real me.

    Common Questions About Reporting Fake Accounts

    Will the fake user know I reported them?

    No. Reports are anonymous. The person or bot won’t know you submitted the complaint.

    How long does Instagram take to respond?

    There’s no guaranteed timeline. Some users report action within hours, others wait days or weeks.

    Can I contact Instagram directly?

    Not usually. Instagram doesn’t offer live support for most users. For urgent brand cases, consider Meta Business Support if your account is linked to a business manager.

    Final Thoughts

    Reporting fake Instagram accounts isn’t just about protecting yourself—it also helps keep the community safe. Whether you’re a casual user, public figure, or business owner, it’s essential to take action when someone pretends to be you.

    By following the steps in this guide, you can make sure your report is handled the right way, and reduce the risk of harm or confusion caused by impersonators.

  • How to Use Excel on Windows for Social Media Content Planning

    How to Use Excel on Windows for Social Media Content Planning

    If you manage social media for a business, a project, or even just your personal brand, planning your content is essential. Trying to remember what to post, where, and when can get chaotic quickly. While there are fancy social media management tools out there, sometimes the most reliable and accessible tool is already on your Windows computer: Microsoft Excel.

    I’ve built countless content calendars in Excel over the years. It’s incredibly flexible, easy to use, and you can customize it exactly to your needs. You don’t need to be an Excel expert to create a functional plan for your social media content.

    Why Use Excel for Social Media Planning?

    • Accessibility: Most Windows users already have Excel or a compatible spreadsheet program.
    • Flexibility: You can add, remove, or change columns and rows to fit your specific workflow and the platforms you use.
    • Organization: Spreadsheets are naturally structured for organizing information in rows and columns.
    • Cost-Effective: If you already own Excel, it costs nothing extra to use it for planning.

    It provides a clear overview of your posting schedule, helps ensure consistency, and makes sure you don’t miss important dates or events.

    How to Create Your Social Media Content Calendar in Excel

    Here’s a step-by-step guide to setting up your social media content calendar using Excel on Windows:

    Step 1: Open a New Workbook

    • Open Microsoft Excel on your Windows PC.
    • Click on ‘Blank workbook’ to start a new spreadsheet.

    Step 2: Set Up Your Columns (Headers)

    In the first row (Row 1), you’ll create the headers for each piece of information you want to track for every social media post. Click on cell A1 and type the first header, then press Tab to move to B1 and type the next, and so on. Here are some essential columns to include:

    • A1: Date: The date the content will be posted (e.g., 2025-04-25). Using a consistent date format helps with sorting.
    • B1: Time: The time of day the content will go live (e.g., 10:00 AM, 14:30).
    • C1: Platform: Which social media platform is this for? (e.g., Instagram, Facebook, Twitter, LinkedIn, TikTok).
    • D1: Content Type: What kind of post is it? (e.g., Photo, Video, Link Share, Text Update, Carousel, Reel, Story).
    • E1: Text/Copy: The caption or text that will accompany the visual content. Write your draft copy here.
    • F1: Image/Video File Name: The name of the image or video file you’ll use (e.g., ‘product_launch_photo_1.jpg’, ‘explainer_video_v2.mp4’). This makes it easy to find the asset later.
    • G1: Link/URL: If the post includes a link (to a blog post, product page, etc.), put the full URL here. Use UTM parameters if you’re tracking link clicks.
    • H1: Status: Track the progress of the content (e.g., Idea, Draft, Ready for Review, Approved, Scheduled, Posted, Cancelled).
    • I1: Notes: Any additional information, specific hashtags, tags, or context for the post.

    My Experience: Starting with these core columns is a great foundation. You can always add more later based on your specific needs, like columns for Campaign Name, Creator (if working with a team), or Performance Metrics (after posting).

    Step 3: Format Your Headers

    Make your headers stand out and stay visible.

    • Bold: Select the entire first row (Row 1) by clicking on the ‘1’ header on the left. Click the ‘B’ button in the ‘Font’ section of the ‘Home’ tab to make the text bold.
    • Fill Color (Optional): While the row is still selected, click the ‘Fill Color’ bucket icon in the ‘Font’ section and choose a background color to make the headers visually distinct.
    • Freeze Panes: This is very helpful. Click on ‘View’ tab. In the ‘Window’ section, click ‘Freeze Panes’, then select ‘Freeze Top Row’. Now, when you scroll down, your headers will always be visible.

    Step 4: Input Your Content

    Now you can start filling in your calendar! Each row (starting from Row 2) represents one planned social media post.

    • Click on cell A2 (under your ‘Date’ header) and enter the date for your first planned post.
    • Move across the row, filling in the Time, Platform, Content Type, writing your Text/Copy, noting the file name, adding the link, setting the initial Status (e.g., ‘Draft’), and adding any Notes.
    • Move to Row 3 for your next post, and continue filling in your content day by day, week by week.

    Step 5: Use Tabs for Organization (Optional but Recommended)

    If you’re planning for multiple months or want to separate content by major campaigns or platforms, use the sheet tabs at the bottom of the Excel window.

    • Double-click on the default sheet name (like ‘Sheet1’) at the bottom.
    • Type a new name (e.g., ‘April 2025’, ‘May 2025’, ‘Instagram Posts’, ‘Product Launch Campaign’).
    • Click the ‘+’ button next to the tabs to add new sheets/tabs as needed.

    Step 6: Add Basic Filtering (Optional but Recommended)

    Filtering lets you quickly see only the information you need.

    • Select the entire header row (Row 1).
    • Click the Data tab.
    • In the ‘Sort & Filter’ section, click the Filter button.
    • Now, small dropdown arrows will appear next to each header cell. Click an arrow (e.g., next to ‘Platform’) to sort or filter the data (e.g., show only ‘Instagram’ posts).

    Step 7: Save and Access

    • Click File’ > ‘Save As’.
    • Choose a location on your computer or cloud storage (like OneDrive) and give your calendar a clear name (e.g., ‘Social Media Content Calendar 2025’).
    • Saving to cloud storage makes it accessible from other devices and easier to share if you’re working with a team.

    Tips for Using Your Excel Calendar Effectively

    • Be Consistent: Regularly update your calendar to reflect planned posts and their current status.
    • Review Regularly: Look at your calendar weekly or monthly to ensure your content aligns with your overall strategy and upcoming events.
    • Include Space for Ideas: Create a column or even a separate tab for content ideas you can pull from later.
    • Color Coding (Advanced Optional): You could use conditional formatting to automatically color-code rows based on status or platform if you want a more visual overview.

    What Excel Doesn’t Do

    While great for planning, Excel doesn’t publish content directly. You’ll still need to copy the text, grab the file name to find your image/video, and schedule or post manually using the social media platforms or dedicated scheduling tools. Collaboration can also be less seamless than in dedicated calendar software unless you’re using cloud-synced files.

    However, for creating a structured, flexible, and clear plan for your social media activity right on your Windows computer, Excel is a powerful and accessible tool. Get started by setting up your columns, and then fill it with your content ideas!

  • How to Connect to a VPN in Windows Without Third-Party Apps

    How to Connect to a VPN in Windows Without Third-Party Apps

    A VPN (Virtual Private Network) is a great tool for boosting your online privacy, securing your connection on public Wi-Fi, or accessing networks like your office from home. Many VPN services provide their own apps, but did you know Windows has a built-in capability to connect to VPNs using standard protocols? This means you don’t need to install any extra software just to get connected. It’s especially useful for connecting to corporate networks or if your VPN provider gives you the details for manual setup. I’ve used the built-in client myself when needing a quick, no-fuss connection without adding another app to my system.

    Using the built-in Windows VPN client is a straightforward way to establish a secure connection, provided you have the necessary information from your VPN provider or network administrator. This guide will walk you through setting it up and connecting.

    Why Use the Built-in Windows VPN?

    • No Extra Software: Keeps your system cleaner.
    • Simple Interface: Uses familiar Windows settings.
    • Good for Standard Connections: Works well for connecting to networks using common, natively supported protocols.
    • Ideal for Corporate VPNs: Many company networks use protocols compatible with the Windows client.

    What You Need Before You Start

    To set up a VPN connection manually in Windows, you absolutely must have specific details from your VPN provider or the administrator of the network you’re connecting to. Windows can’t guess this information.

    You will need:

    • The VPN provider name (this is just for your reference, like “My Work VPN”).
    • The Server name or address (this is the crucial address of the VPN server, e.g., vpn.yourcompany.com or an IP address).
    • The VPN type (This tells Windows which protocol to use. It must be one of the types Windows supports natively: PPTP, L2TP/IPsec, SSTP, or IKEv2. Your provider will tell you which to use).
    • The Type of sign-in info (How you authenticate. Common types are Username and password, Pre-shared key (PSK), or Certificate. Your provider will specify).
    • Your Username and Password for the VPN.
    • If using L2TP/IPsec with a Pre-shared key, you will also need that specific key (a secret string of characters).

    Note: Popular protocols like OpenVPN and WireGuard are generally NOT supported by the built-in Windows client and require dedicated third-party apps.

    Understanding the Built-in VPN Protocols

    Windows’ native client supports several standard VPN protocols. Your provider will tell you which one to use. Here’s a simple overview:

    • PPTP (Point-to-Point Tunneling Protocol): An older protocol. It’s fast but considered less secure than others and can be easily blocked by firewalls. Use only if necessary and for non-sensitive tasks.
    • L2TP/IPsec (Layer 2 Tunneling Protocol over Internet Protocol Security): More secure than PPTP. It pairs L2TP for tunneling with IPsec for encryption and security. Often requires a pre-shared key or certificate for authentication.
    • SSTP (Secure Socket Tunneling Protocol): A Microsoft-developed protocol that uses SSL/TLS over TCP port 443. This makes it good at bypassing firewalls that might block other VPN traffic. It’s generally secure.
    • IKEv2 (Internet Key Exchange version 2): A modern, secure protocol often used for its stability, especially when switching between different networks or reconnecting after drops.

    Step-by-Step: Setting Up the VPN Connection in Windows

    This is where you add your VPN connection details to Windows Settings.

    1. Open Settings: Click the Start button and select Settings, or press Windows key + I.
    2. Go to Network & internet: In the left-hand menu, click on Network & internet.
    3. Select VPN: Scroll down and click on VPN.
    4. Add a VPN connection: Click the Add VPN button at the top of the VPN settings page.
    5. Fill in the Connection Details: A new window titled “Add a VPN connection” will appear. You’ll fill this out with the information provided by your VPN service.
      • VPN provider: Click the dropdown and select Windows (built-in).
      • Connection name: Type a descriptive name for this connection (e.g., “My Company VPN”, “My Secure Connection”). This is just for you to identify it.
      • Server name or address: Enter the VPN server address or name exactly as provided by your service (e.g., vpn.example.com or 192.168.1.100).
      • VPN type: Click the dropdown and select the protocol your provider specified (e.g., L2TP/IPsec with pre-shared key, SSTP, IKEv2).
      • Type of sign-in info: Click the dropdown and select the authentication method your provider specified (e.g., Username and password is most common for consumer VPNs).
      • User name (optional): Enter your VPN username. You can leave this blank if you prefer to enter it each time you connect.
      • Password (optional): Enter your VPN password. You can leave this blank if you prefer to enter it each time.
    6. Add Pre-shared Key (If Applicable): If you selected L2TP/IPsec with pre-shared key as the VPN type, you’ll see a field appear or an “Advanced options” link. Click the link if needed, and you’ll find a field to enter the Pre-shared key. Enter the key provided by your service exactly.
    7. Save: Click the Save button at the bottom of the “Add a VPN connection” window.

    Your VPN connection is now saved and ready to use.

    Step-by-Step: Connecting to Your VPN

    Once the connection is set up, connecting is quick.

    1. Go back to VPN Settings: Open Settings > Network & internet > VPN.
    2. Click the VPN Connection: You will see the name of the VPN connection you created listed. Click on it.
    3. Click Connect: Click the Connect button.
    4. Enter Credentials (If Needed): If you didn’t save your username and password during setup, a small window will pop up asking for them. Enter them and click OK or Connect.
    5. Check Status: The status below the VPN connection name will change to Connected when the connection is successful.

    You are now connected to the VPN! Your internet traffic should be routed through the VPN server.

    Connecting via Quick Settings

    For faster access, you can connect directly from the network icon in your system tray.

    1. Click the Network, Volume, or Battery icon (usually a Wi-Fi symbol) in the bottom right corner of your taskbar.
    2. In the Quick Settings panel that pops up, click the VPN button.
    3. You will see a list of your configured VPN connections. Click the name of the VPN you want to connect to.
    4. Click Connect (and enter credentials if prompted).

    To disconnect, simply repeat these steps and click the Disconnect button that appears.

    Troubleshooting Common Connection Issues

    If your VPN connection fails, double-check these common culprits:

    • Incorrect Server Address: Verify the server name or address you entered in settings. A single typo will prevent connection.
    • Wrong Username or Password: Re-enter your credentials carefully. Ensure Caps Lock is off.
    • Wrong VPN Type (Protocol): Confirm with your provider which specific protocol (PPTP, L2TP, SSTP, IKEv2) you should be using and that you selected it correctly in Windows settings.
    • L2TP/IPsec Pre-shared Key Error: This is a very common mistake. Make sure the pre-shared key is entered exactly correctly, including capitalization.
    • Firewall Blocking Connection: Your local firewall (Windows Firewall or a third-party one) or network firewall might be blocking the VPN protocol’s traffic. SSTP often works best through restrictive firewalls.
    • Server Issues: The problem might be on the VPN server’s end. Contact your VPN provider or administrator to see if there are known issues.
    • Protocol Specific Issues: PPTP is often blocked due to security concerns. L2TP/IPsec can have NAT traversal issues.

    If you continue to have problems, comparing the specific error message you receive in Windows to your VPN provider’s support documentation or contacting them directly is often the best next step.

    Limitations of the Built-in Client

    While convenient, the built-in Windows VPN client is basic compared to many third-party VPN apps. It typically lacks features like:

    • A large list of server locations to choose from (you have to know the specific address).
    • One-click connection interface.
    • Advanced features like split tunneling (choosing which app traffic goes through the VPN), kill switch (blocking internet if the VPN drops), or automatic protocol selection.
    • Support for popular protocols like OpenVPN and WireGuard without installing additional software or drivers.

    However, for a simple, built-in way to connect to a compatible VPN, the Windows client does the job effectively without needing any third-party installation. Setting it up manually gives you a clear understanding of the connection details, which can be empowering.