Crashes, No Sound, or Screen Glitches?
Random freezes, missing sound and display glitches usually trace back to one bad driver. Find and replace yours safely.Free scan · under a minuteWindows Errors? Fix Them Before They Spread
Repair common Windows errors and clear accumulated junk for a smoother, more stable PC - no reinstall needed.Free scan · no reinstallSpecifiction is reader-supported. When you buy through links on our site, we may earn an affiliate commission. As an Amazon Associate I earn from qualifying purchases. Learn more
Over time, dust inevitably accumulates inside your computer. This buildup can act like an insulator, trapping heat and causing your components to run hotter, potentially leading to performance issues, system instability, and even reduced lifespan. I’ve personally seen computers choked with dust perform significantly better after a thorough cleaning. While it might seem daunting, cleaning your computer’s internal components is a straightforward process if done carefully and correctly. This guide will walk you through the step-by-step process to safely clean your computer’s internal components in April 2025, ensuring your machine runs smoothly and efficiently.
Step 1: Preparation is Key – Safety First (April 2025)
As an Amazon Associate I earn from qualifying purchases.
Quick wins for a faster PC:
Repair Windows errors before they cause bigger problemsFix Now →Fix the driver behind crashes, sound loss and screen glitchesFind Drivers →Clear out junk files and repair common Windows errorsFree Scan →Before you even think about opening your computer, safety should be your top priority.
- Power Down and Unplug: Completely shut down your computer and unplug the power cable from the wall outlet. For laptops, also remove the battery if it’s easily accessible. This is the most crucial step to prevent electrical shock and damage to your components.
- Gather Your Tools: You’ll need a few essential tools for safe and effective cleaning:
- Canned Compressed Air: This is your primary weapon against dust. Use short bursts and keep the can upright to avoid spraying liquid.
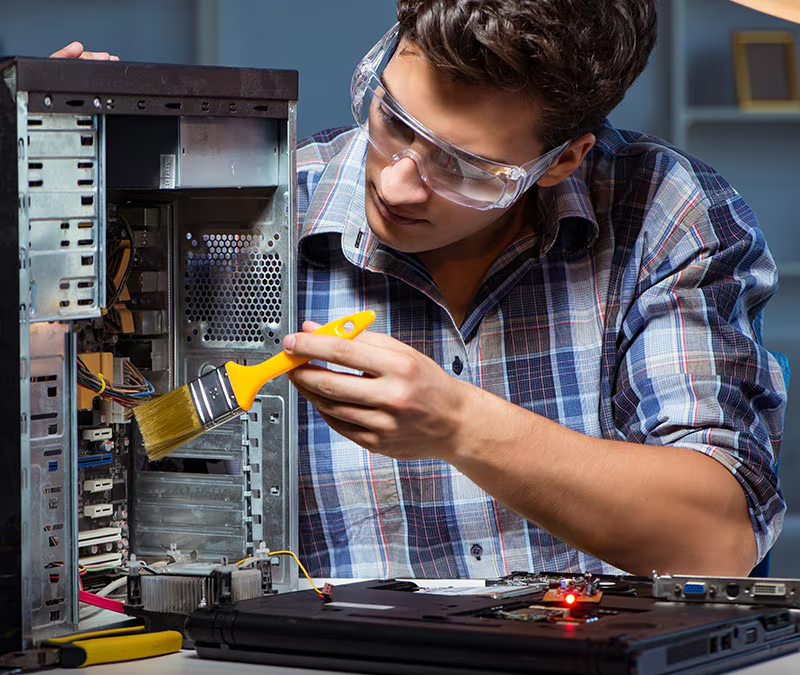
- Soft Anti-Static Brush: A small brush with soft bristles (like a paintbrush or a dedicated anti-static brush) is useful for gently loosening dust.
- Isopropyl Alcohol (90% or higher): For cleaning stubborn residue on non-sensitive components like heat sinks and fan blades. Avoid getting it on circuit boards directly.
- Microfiber Cloths: Lint-free cloths are ideal for wiping down surfaces.
- Small Phillips Head Screwdriver: You’ll need this to open your computer case and potentially remove components like fans.
- Anti-Static Wrist Strap (Recommended): While optional, an anti-static wrist strap helps prevent electrostatic discharge (ESD), which can damage sensitive electronic components. Clip one end to a grounded metal part of your computer case (while it’s unplugged) and wear the strap on your wrist.
- Choose a Well-Ventilated Workspace: Select a clean, well-lit area with good airflow to perform the cleaning. Avoid carpeted areas if possible, as they can generate static electricity.
Step 2: Accessing the Internal Components – Opening Your Computer (April 2025)
Shopping ad

- Powerful Turbo Fan:WOLFBOX MegaFlow 50 electric air duster reaches speeds of up to 110,000 RPM, effectively removing dust and debris. It features three adjustable speed settings to suit different cleaning tasks.
- Economical and Reusable: Built from durable materials with a long-lasting battery, the WOLFBOX MegaFlow 50 is a sustainable alternative to disposable air cans, enhancing your cleaning experience.
- Portable and Lightweight: Weighing only 0.45 lb, this compact air duster is easy to carry. The included lanyard ensures convenient use both indoors and outdoors.
- Wide Application: WOLFBOX MegaFlow 50 electric air duster comes with 4 nozzles, making it suitable for a variety of scenes, such as pc, keyboards, or other electronic devices. It also serves well for home clean and car duster.
- 3.5 Hours Fast Charging: WOLFBOX MegaFlow 50 electric air duster recharges in just 3.5 hours with a type-C cable. Enjoy up to 240 minutes of use on the lowest setting, with four charging options to suit your needs.To ensure optimal performance of your MF50, please fully charge the battery before use.
The process for opening your computer varies depending on whether it’s a desktop or a laptop.
For Desktop Computers:
- Locate the Case Screws: Most desktop cases have screws on the back or sides that secure the panels.
- Remove the Side Panels: Use your screwdriver to carefully remove the screws and detach the side panels. Consult your computer’s manual if you’re unsure how to open the case.
For Laptop Computers:
- Consult Your Laptop’s Manual: Laptops are more intricate, and the process for accessing internal components varies significantly between models. Your laptop’s service manual (often available online) will provide specific instructions on how to open the case.
- Remove Bottom Panel Screws: Typically, you’ll need to remove several small screws from the bottom of the laptop.
- Carefully Pry Open the Case: Use a thin, non-metallic tool (like a plastic spudger or a guitar pick) to gently pry open the bottom panel. Be careful not to force it, as you could damage the case or internal components.
If you are not comfortable opening your laptop, it’s best to consult your laptop’s manual or seek professional help.
Free tools Windows power users keep installed
One-click scans. No signup required.
Step 3: Cleaning the Fans – The Primary Dust Collectors (April 2025)
Fans are the main culprits for dust accumulation.
- Stabilize the Fan Blades: Use your finger or a small object to gently hold the fan blades in place. This prevents the fan from spinning freely when you spray compressed air, which can potentially damage the fan motor.
- Blow Away the Dust: Use short bursts of compressed air to blow dust out of the fan blades and the surrounding areas. Work from different angles to dislodge all the dust.
- Wipe Down Fan Blades (If Necessary): For stubborn dust or residue, lightly dampen a microfiber cloth with isopropyl alcohol and gently wipe the fan blades. Ensure the alcohol has completely evaporated before powering on the computer.
Clean fans are crucial for proper airflow and cooling.
Shopping ad

- POWERFUL DUST REMOVAL FOR ELECTRONICS – Removes dust, dirt, and debris from keyboards, computers, laptops, printers, gaming consoles, and other sensitive electronics for optimal performance.
- PRECISION CLEANING WITH EASY-TO-USE NOZZLE – Provides controlled airflow to reach tight spaces, vents, ports, and hard-to-clean areas in office equipment and electronics.
- VERSATILE CLEANING SOLUTION – Ideal for cleaning computers, keyboards, printers, cameras, office equipment, gaming systems, workstations, and other electronic devices.
- SAFE FOR HOME AND OFFICE USE – Contains bitterant to discourage inhalant misuse and provides a safer alternative to liquid cleaners that may damage electronic components.
- VERSATILE CLEANING SOLUTION – Ideal for cleaning computers, keyboards, printers, cameras, office equipment, gaming systems, workstations, and other electronic devices.
Step 4: Cleaning the Heat Sinks – Ensuring Efficient Cooling (April 2025)
Heat sinks are designed to dissipate heat from components like the CPU and GPU. Dust buildup can significantly reduce their effectiveness.
What’s actually slowing this PC down?
Pick the symptom - the matching free tool is one click away.
- Blow Away Dust: Use compressed air to blow dust out from between the fins of the heat sink.
- Gently Brush Away Stubborn Dust: If compressed air isn’t enough, use a soft anti-static brush to gently loosen and remove dust from the fins.
- Wipe Down (If Necessary): For stubborn residue, lightly dampen a microfiber cloth with isopropyl alcohol and gently wipe the exposed surfaces of the heat sink. Ensure it’s completely dry before reassembling.
Efficient heat dissipation is vital for component longevity and performance.
Step 5: Cleaning the Motherboard and Other Components (April 2025)
Shopping ad
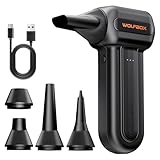
- 110,000 RPM Power Air Duster: Engineered with a brushless motor reaching up to 110,000 RPM in third gear. This electric air duster blasts away microscopic dust and crumbs from keyboards, computer cases, and radiator fans. "1-min maintenance, 10-min deep clean" for PC gamers and tech enthusiasts.
- 3 Speeds & Long Runtime: Features 3-speed settings: Gear 1 (25K RPM) for delicate electronics, Gear 2 (60K RPM) for daily dusting, Gear 3 (110K RPM) for tough debris. With 2*2500mAh batteries, it runs up to 240 mins on Gear 1 and fully charges in 3.5 hours.
- Lightweight & Portable Design: Weighing only 0.5 lbs.Our mini air blower is exceptionally easy to handle and carry. Its compact size fits perfectly in a camera backpack or car glove box, making it ideal for on-the-go photographers and campers who need to clean lenses or clear campsite debris quickly .
- Reusable & Cost-Effective Investment: Replaces disposable canned air that run out quickly and freeze up. This cordless air blower is rechargeable and designed for repeated use, saving money in the long run by eliminating the need to constantly buy canned air . It serves as a sustainable cleaning partner for electronics, home surfaces, keyboards, and delicate gadgets.
- Versatile Cleaning Tool: The WOLFBOX MF60 Electric Air Duster comes with 5 nozzles: a flat nozzle for blowing dust off PC cases and desks, a long nozzle for deep cleaning computer keyboards and car vents, a round all-purpose nozzle, and a swim ring/air mattress nozzle for outdoor inflation and camping. From electronics to car care and outdoor life, it's an all-in-one solution.
The motherboard and other components can also accumulate dust.
- Use Compressed Air: Use short bursts of compressed air to blow dust off the motherboard, RAM modules, expansion cards (like your graphics card), and any other visible components. Hold the compressed air can at a slight angle to help lift the dust.
- Gently Brush Away Dust: Use a soft anti-static brush to gently loosen dust from hard-to-reach areas and components. Be careful not to apply too much pressure.
Avoid spraying compressed air directly at close range on sensitive components like capacitors, as this could potentially damage them.
Step 6: Cleaning the Power Supply (Desktop Only – April 2025)
The power supply unit (PSU) also collects dust, and cleaning it can improve airflow and prevent overheating.
Shopping ad

- Powerful Turbo Fan:CAGIWIRU Electric Air Duster have reached speed up to 130000RPM,Can efficient remove dust and debris.With LED light and Three Adjustable Speed to meet with different cleaning tasks.
- With Attached USB C Fasting Charging cable.Charing 3 hours,Enjoy up to 240 minutes of use on the lowest setting, For third speed can use for 25mins.with four charging options to meet with your needs.
- Wide Application: attached 5 different nozzles,making it suitable for a variety of scenes, such as car,pet, pc, keyboards, and other electronic devices. It also serves for office and home clean duster.
- Handy Design & Portable:Cordless air duster electric nozzle is Light weight and small size, design and comfortable to hold and space saving, convenient to carry around. You can put it in your room or inside the car without taking up space.
- Economical &Reusable: Built durable materials with a long-lasting battery,our CAGIWIRU air duster it's a sustainable alternative to disposable air cans.
- Some PSUs Can Be Opened (Use Caution): Some desktop PSUs have screws that allow you to open the casing and clean the internal fan. However, only attempt this if you are comfortable and knowledgeable about electronics. There are capacitors inside that can hold an electrical charge even after the PSU is unplugged, which can be dangerous.
- Clean from the Outside (Safer Method): If you’re not comfortable opening the PSU, you can still clean it by using compressed air to blow dust out through the fan vents on the outside.
Step 7: Cleaning Storage Devices (April 2025)
SSDs (Solid State Drives) and HDDs (Hard Disk Drives) don’t typically require internal cleaning by the user. Focus on cleaning the exterior.
- Wipe Down Exteriors: Use a slightly damp microfiber cloth (with water only, no cleaning solutions) to wipe down the exterior surfaces of your SSDs and HDDs to remove any surface dust.
Step 8: Reassembling Your Computer (April 2025)
Once you’ve thoroughly cleaned all the internal components, it’s time to put your computer back together.
For Desktop Computers:
- Carefully Replace Expansion Cards: If you removed any expansion cards, ensure they are firmly seated back in their slots.
- Reattach Side Panels: Align the side panels with the case and secure them with the screws you removed earlier. Don’t overtighten the screws.
For Laptop Computers:
- Carefully Align and Reattach the Bottom Panel: Ensure all internal cables are tucked away properly and gently press the bottom panel back into place.
- Reinsert and Tighten Screws: Reinsert all the screws you removed from the bottom panel and tighten them gently.
Step 9: Final Touches and Testing (April 2025)
With your computer reassembled, it’s time for the final steps.
- Plug in Peripherals: Reconnect your monitor, keyboard, mouse, and any other external devices.
- Plug in the Power Cord: Connect the power cord back into the wall outlet.
- Power On Your Computer: Turn on your computer and observe if it boots up normally.
- Monitor Performance and Temperature: After cleaning, monitor your computer’s performance and temperatures. You should notice a difference, especially if dust buildup was significant. You can use monitoring software to check component temperatures.
My Personal Insights on Computer Cleaning (April 2025)
I’ve found that regular cleaning, even just a quick blast of compressed air every few months, can significantly prolong the life and improve the performance of your computer. It’s a simple maintenance task that can prevent more serious issues down the line. Remember to be gentle and take your time, and if you’re ever unsure about a step, don’t hesitate to consult your computer’s manual or seek professional help. A clean computer is a happy computer!
Quick Recap
Product prices and availability are accurate as of the date/time indicated and are subject to change. Any price and availability information displayed on Amazon at the time of purchase will apply.
The Tool Desk
Outbyte Driver Updater FREEFix the driver behind crashes, sound loss and screen glitchesFind Drivers →Outbyte PC Repair FREEClear out junk files and repair common Windows errorsFree Scan →