What’s actually slowing this PC down?
Pick the symptom - the matching free tool is one click away.
Specifiction is reader-supported. When you buy through links on our site, we may earn an affiliate commission. As an Amazon Associate I earn from qualifying purchases. Learn more
It happens to the best of us: in a moment of haste, you click “Delete,” and suddenly, that crucial document, cherished photo, or important project file vanishes. The panic sets in. Can you get it back? The good news is, in many cases, yes! Accidentally deleted files on Windows are often recoverable, but your chances improve significantly the sooner you act.
Understanding how file deletion works in Windows is key to successful recovery. When you “delete” a file, especially from your local drive and not bypassing the Recycle Bin, the file isn’t immediately erased from your hard drive or Solid State Drive (SSD). Instead, Windows simply marks the space occupied by that file as “available” for new data. The file’s data remains until new information overwrites it. This concept is crucial in the field of data recovery, which has evolved significantly since the early days of computing when accidental deletion often meant permanent loss. Modern operating systems and recovery tools leverage this underlying mechanism to retrieve seemingly lost data.
General shopping ads
This guide will walk you through a series of methods to help you recover accidentally deleted files on your Windows computer, ranging from simple built-in solutions to more advanced techniques involving specialized software.
Recommended Free Tools
Understanding File Deletion Types in Windows
Before diving into recovery, it’s important to differentiate how files are deleted:
Shopping ad

- Dimensions: 7.5" x 4.3" x 2.2". Compact size and lightweight make it easy to carry and put into your backpack, handbags or laptop bag without taking much space. Suitable for family use and daily organization. Note: Small mesh pockets are ideal for charging cords no longer than 3ft; longer cables (over 3ft) fit better in the larger compartments
- Quality Material: This electronic organizer travel case made of high quality durable waterproof oxford and soft sponge inside to secure your gadgets in place and deliver a quick access whenever you want. Water-resistant fabric protects your gear from unexpected splashes, keeping all your electronic essentials safe and secure
- Double Layers Design: This tech pouch features a double-layer interior design with 8 compartments, including multiple see-through mesh pockets and ample space to store your cords, cables, USB drives, cellphone, charger, mouse, flash drive and more, keeping all accessories neatly organized and tangle-free
- Practical and Convenient: Comes with a comfortable hand strap for easy carrying; You may carry it in your hand when heading out. Durable and smooth zipper closure keeps your favorite device securely, convenient for you to have quick access to the items inside the case
- Portable and Lightweight: The small size and lightweight design durable cable organizer pouch is a perfect choice when going on holiday, business trip, travel, office. Enjoy hassle-free travel without wasting time on tangled accessories. Great gift for yourself also a nice share with families and friends. (No include cords, electronic accessories)
As an Amazon Associate I earn from qualifying purchases.
- Soft Delete (To Recycle Bin): When you select a file and press Delete or right-click and choose “Delete,” the file is moved to the Recycle Bin. This is the easiest type of deletion to recover from.
- Recycle Bin: A special folder in Windows that temporarily stores files and folders that have been deleted by the user, allowing for easy restoration.
- Hard Delete (Bypassing Recycle Bin): This happens when you:
- Press Shift + Delete.
- Delete files from a USB drive, network drive, or external hard drive (these usually bypass the Recycle Bin).
- Empty the Recycle Bin.
- Delete files from the Command Prompt. In these cases, the file is immediately marked as free space, making recovery slightly more challenging but often still possible.
Methods to Recover Accidentally Deleted Files
Let’s explore the step-by-step methods to get your files back.
Method 1: Check the Recycle Bin (The First and Easiest Step)
Quick wins for a faster PC:
Scan for outdated or missing drivers - takes under a minuteDriver Scan →Clear out junk files and repair common Windows errorsFree Scan →This is always your first stop for any accidentally deleted file on your primary drive.
- Step 1: Open the Recycle Bin.
- Locate the Recycle Bin icon on your desktop and double-click it.
- If you can’t find it, search for “Recycle Bin” in the Windows search bar.
- Step 2: Locate Your File(s).
- Browse through the list of deleted files. You can sort by “Date Deleted,” “Original Location,” or “Name” to help find your file.
- Use the search bar in the Recycle Bin window if you know the file name or type.
- Step 3: Restore the File(s).
- Once you find the file(s) you want to recover, select them.
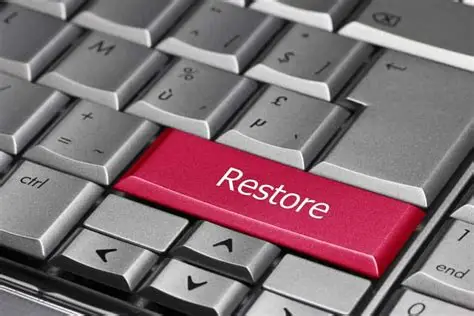
- Right-click on the selected file(s) and choose “Restore.”
- Alternatively, click the “Restore the selected items” button in the ribbon menu at the top.
- Step 4: Verify Restoration.
- The file(s) will be restored to their original location before deletion. Navigate to that folder to confirm.
Method 2: Use File History (If Enabled)
File History is a built-in Windows backup feature that automatically saves copies of files in your Libraries, Desktop, Favorites, and Contacts folders. It requires an external drive to be set up. If you’ve enabled it, this is a powerful recovery tool.
File History: A backup and recovery feature in Windows that regularly saves copies of your files, allowing you to restore previous versions of files or entire folders.
Shopping ad

- 【UPGRADED LAPTOP CLEANING KIT 】 The macbook cleaning kit computer screen cleaner comes with a number of accessories including a retractable large brush, polishing cleaning cloth X 2, keycap puller, metal pen tip, flocking sponge, thin soft brush, soft plastic lens cleaning pen, 5 replacing cloth, large cleaning microfiber cloth. You deserve the comprehensive computer cleaning kit keyboard vacuum at a low cost
- 【PROFESSIONAL KEYBOARD CLEANING KIT】 The laptop screen cleaner keyboard cleaner can pull out the keycaps of gaming keyboards and mechanical keyboards. A retractable keyboard brush works on laptops and keyboards, while the mini high-density brush is great for deep cleaning between keys for cleaning between flatter keys on a laptop, the metal pin tip gently removes any stains. This electronic cleaning kit macbook cleaner totally meets professional cleaning needs
- 【OFFICE DESK ACCESSORIES】This keyboard cleaner kit is easy to use and can clean your keyboard and electronic screen with just one swipe. Wiping with the 2mm thicken widen polishing cleaning cloth designed at a right angle for better fitting screen corners of computers with our recyclable cleaning spray, The laptop cleaner kit for macbook effectively absorbs stubborn stains, leaves no discoloration, no streaks, and no fiber shedding on the screens
- 【MULTIFUNCTIONAL TOOLS 】Mini soft brush and soft plastic lens cleaning pen are specially designed for DSLR camera screen, lens, and other delicate surfaces. 5 more cleaning cloths of it supplied for replacement. The flocking sponge is an excellent tool for cleaning earbuds charging cases, And the earbud cleaning kit is ideal. This electronics for college students is equivalent to 10 other electronic cleaning kit
- 【PORTABLE DESIGN & CLEANER TOOL】 The office supplies is compact in design, easy to carry, and you can easily take it anywhere. It's convenient to keep one in a drawer, one in your car, or in your bag and dorm. It is easy to use and can clean your keyboard and electronic screen with just one swipe. Is the college essentials cleaning tool for your friends, family, colleagues and students
- Step 1: Open File History.
- Open Settings (Windows Key + I).
- Go to System > Storage.
- Scroll down and click on “Advanced storage settings,” then “Backup options.”
- Under “Looking for an older backup?”, click “Go to Backup and Restore (Windows 7)” if you’re using an older backup.
- Or, directly search for “Restore your files with File History” in the Windows search bar and open it.
- Step 2: Browse for Your File.
- In the File History window, navigate to the folder where your file was originally located.
- Use the left and right arrows at the bottom to browse through different versions of your folders and files, based on the dates backups were taken.
- Step 3: Restore the File.
- Once you find the desired version of your file or folder, select it.
- Click the green circular arrow button at the bottom to restore it to its original location.
- If the original location is unavailable or you want to restore it elsewhere, right-click the green arrow and choose “Restore to…”
I’ve personally found File History to be a lifesaver for documents I’ve accidentally overwritten or deleted from common folders. It’s truly a “set it and forget it” feature for basic file protection.
The Tool Desk
Outbyte Driver Updater FREEFix the driver behind crashes, sound loss and screen glitchesFind Drivers →Outbyte PC Repair FREERepair Windows errors before they cause bigger problemsFix Now →Method 3: Recover Previous Versions of Files or Folders
This feature, related to System Restore Points and File History, allows you to revert a file or folder to a previous state. It works even if File History isn’t explicitly set up, provided System Protection is enabled for the drive.
Previous Versions: A feature in Windows that allows users to restore files and folders to an earlier state, based on restore points or File History backups.
- Step 1: Navigate to the Parent Folder.
- Open File Explorer and go to the folder where the deleted file was originally located. If you deleted the folder itself, go to its parent folder.
- Step 2: Access “Restore previous versions.”
- Right-click on the folder.
- Select “Properties” from the context menu.
- Go to the “Previous Versions” tab.
- Step 3: Select and Restore.
- You’ll see a list of available previous versions of that folder, each with a date and time.
- Select the version that you know contained the deleted file (choose a date before the deletion occurred).
- You have three options:
- Open: To view the contents and copy the desired file manually.
- Copy: To copy the folder (and its contents) to a new location.
- Restore: To replace the current version of the folder with the selected previous version (use with caution as this will overwrite current files in that folder).
- It’s generally safer to Open the previous version and copy only the specific file(s) you need to a different location.
Method 4: Use Windows File Recovery (Microsoft’s Free Tool)
Do these 3 things before closing this tab:
1Scan for outdated or missing drivers - takes under a minute2Repair Windows errors before they cause bigger problems3Fix the driver behind crashes, sound loss and screen glitchesShopping ad

- Compatible Space: This electronics organizer bag features 2 zippered mesh pockets fits phones, standard power banks, 4 elastic loop pouches for small items, 2 elastic loop pouches for wireless headphones and small chargers. Elastic loops for phone charging cable. And specific slots for SD cards. Please check the size to ensure it meets your needs
- Lightweight Travel Accessories: The size of the electronic organizer travel case is 10.6" L x 7.5" W x 1.2" H, Compact but substantial size fits your intended bag or space. Suitable for traveling use and daily organization
- Keep Everything Organized: This compact travel organizer features dedicated compartments for your phone charger, cables, and tech accessories, keeping them tangle-free and ready to go. You can find travel accessories quickly, no chasing cords in your pack anymore
- Durable Travel Essentials: Features double zippers for easy access, elastic loops with non-slip grips for daily protection. Organizer for office use and traveling, (Not including cords, electronic accessories). It can serve as a travel checklist. Before you leave a place, just open the case and check if everything is there, preventing you from leaving things behind
- Versatile Use: Its practicality and convenience make it a travel essential bag. It is suitable for a weekend trip, business trip, and travel. This organizer pouch is suitable for office, business, daily use and can be given as a gift for friends, family, or men, for birthdays, Valentine's Day, Christmas Day, Father's Day
For files that have bypassed the Recycle Bin or were deleted long ago, Windows File Recovery is a free command-line utility from Microsoft. It’s powerful but requires comfort with the Command Prompt.
Windows File Recovery: A command-line utility developed by Microsoft for recovering lost files from local storage devices.
- Step 1: Download Windows File Recovery.
- Go to the Microsoft Store and search for “Windows File Recovery.”
- Click “Get” or “Install” to download and install it.
- Step 2: Open Command Prompt as Administrator.
- Search for “cmd” in the Windows search bar.
- Right-click on “Command Prompt” and select “Run as administrator.”
- Step 3: Understand the Syntax.
- The basic syntax for the winfr command is:winfr source-drive: destination-drive: /mode [/switches]
- source-drive: The drive where the file was deleted (e.g., C:).
- destination-drive: The drive where you want to save the recovered files (MUST be different from the source drive, e.g., D: or a USB drive).
- /mode: The recovery mode (Default, Segment, Signature).
- /switches: Specific filters like /n for file path/name, /ext for extension, etc.
- Recovery Modes:
- Default Mode: Good for recently deleted files on NTFS drives.
- Segment Mode: For NTFS drives, recovers files using file record segments.
- Signature Mode: Recovers files across different file systems (NTFS, FAT, exFAT) by searching for specific file types (signatures like .JPG, .PDF, .ZIP). Useful if default/segment fail.
- The basic syntax for the winfr command is:winfr source-drive: destination-drive: /mode [/switches]
- Step 4: Run the Recovery Command.
- Example (Default Mode): Recover a deleted PNG file from C: to D: drive:winfr C: D: /n \Users\<YourUsername>\Pictures\DeletedImage.png
- Example (Signature Mode): Recover all JPG files from C: to D: drive:winfr C: D: /x /y:JPEG (where /x enables signature mode, /y: specifies file types)
- Important: Consult Microsoft’s official documentation or type winfr /? in Command Prompt for a full list of modes and switches.
- Step 5: Access Recovered Files.
- After the command completes, a folder named “Recovery_
This tool is a bit more technical, but it’s powerful because it bypasses the GUI and works directly with the drive’s data. I’ve seen it succeed where other methods failed, especially for hard-deleted items.
Method 5: Use Third-Party Data Recovery Software
When built-in tools fail, specialized third-party data recovery software can often retrieve files that are no longer easily accessible. These tools use advanced algorithms to scan the drive’s raw data for deleted file signatures.
- Key Principle: Stop using the drive immediately! Any new data written to the drive (even just Browse the internet) can overwrite the space where your deleted file resides, making it unrecoverable.
- Step 1: Choose Reputable Software.
- Popular and well-regarded options include:
- Recuva: A free and easy-to-use option for basic recovery.
- EaseUS Data Recovery Wizard: Offers a free trial with a limited recovery amount, then requires purchase.
- Disk Drill: Similar to EaseUS, with a free trial.
- TestDisk & PhotoRec: Free, open-source, and highly powerful (command-line based), but steeper learning curve.
- Popular and well-regarded options include:
- Step 2: Download and Install (on a different drive if possible).
- Download the software to a different drive than the one you’re trying to recover from to prevent overwriting the deleted file. If you only have one drive, download it quickly and limit other activity.
- Step 3: Scan the Drive.
- Launch the software and select the drive where your files were deleted.
- Choose the type of scan (quick scan first, then deep scan if needed).
- Start the scan. This can take anywhere from minutes to several hours depending on the drive size and scan depth.
- Step 4: Preview and Recover.
- The software will display a list of recoverable files, often with an indication of their condition (e.g., “Excellent,” “Poor”).
- Preview files if possible to ensure they are the correct ones and not corrupted.
- Select the files you want to recover and choose a destination drive that is different from the source drive to save them.
Important Considerations for File Recovery
- Act Immediately: The moment you realize you’ve deleted a file, stop using the drive where it was located. Every minute of continued use increases the risk of the data being overwritten.
- Do Not Save New Files: Avoid saving any new files or installing new software on the affected drive until recovery is complete.
- Use a Different Drive for Recovery: Always recover files to a different drive (e.g., a USB stick, an external hard drive, or another internal partition) than the one they were deleted from.
- Understand Different Drive Types:
- HDDs (Hard Disk Drives): Recovery is generally more successful on HDDs because data isn’t truly erased until overwritten.
- SSDs (Solid State Drives): Recovery from SSDs can be more challenging due to TRIM technology. TRIM actively wipes data blocks when files are deleted to maintain performance. If TRIM has run, data recovery might be impossible. However, for very recent deletions, recovery might still be feasible.
- TRIM: A command that allows an operating system to tell a solid-state drive (SSD) which data blocks are no longer considered in use and can be wiped internally.
- Regular Backups are Key: The best “recovery plan” is a good backup strategy. Implement a regular backup routine for your critical files using File History, cloud services (OneDrive, Google Drive), or external drives.
By following these methods and precautions, you significantly increase your chances of successfully recovering your accidentally deleted files on Windows. Don’t give up hope too quickly!
Shopping ad
- Universal fit: ColorCoral cleaning gel, simple and convenient cleaning kits for PC/laptop keyboard and other rugged surface, such as the car vent, camera, printer, telephone, calculator, Instrument, speaker, air conditioner, TV and other appliances
- Safe cleaning gel: The keyboard cleaner gel is made from natural gel, no sticky to hands, smells sweet with lemon fragrance, no stimulation to skin
- Easy dust cleaning: Make sure your hands are dry and clean, knead the cleaning gel into a ball, press the cleaning gel slowly into the keyboard, car vent and rugged surface till the cleaning gel could touch the bottom and then pull out, the dust would be carried away with the cleaning gel
- Reusable: The keyboard cleaning gel could be used repeatedly till the color turn to dark or it become sticky, then you have to replace the cleaning gel with a new one. After cleaning, please stock the cleaning gel in cool place. (Note: Don’t wash the gel in water.)
- In the package: 1 can of universal cleaning gel, we provide the cleaning gel with brand new, if you find the package broken, the cleaning gel dirty, or any other quality issues, please email us through message, we provide you new one soon
Frequently Asked Questions (FAQ)
Q1: Can I recover files deleted permanently (bypassing the Recycle Bin)?
Yes, in many cases, you can recover files deleted permanently (e.g., using Shift+Delete, or emptying the Recycle Bin). These files are not immediately erased but are marked as free space. Tools like Windows File Recovery or third-party data recovery software can often scan for and retrieve them, provided the data hasn’t been overwritten by new information.
Q2: How long do deleted files stay on my hard drive?
Free tools Windows power users keep installed
One-click scans. No signup required.
Deleted files remain on your hard drive (or SSD) until their space is overwritten by new data. There’s no fixed time limit; it depends entirely on how much new data is written to the drive after the deletion. The less you use the drive, the longer the data might remain recoverable.
Q3: What is “data overwriting” and why is it bad for file recovery?
Shopping ad

- Award-Winning Compact Design & EDC-Ready Gift Choice: Weighing only 0.09 lb and sized like a credit card, this compact laser measure is designed for everyday carry. It slips easily into a pocket, tool pouch, or bag, and can attach to a keychain for quick access wherever you go. Its minimalist design, premium tactile finish, and practical one-button measuring make it a useful EDC gadget for DIYers, real estate agents, homeowners, and tech enthusiasts. A thoughtful gift for men on any occasion
- One-Button Easy Measuring, Simple to Use: Designed with simple one-button operation, this compact laser tape measure makes quick measuring easy without complicated controls. Just press to measure room dimensions, furniture spacing, window height, wall décor placement, and everyday distances around the home. Ideal for users who want a smart, pocket-size measuring tool that fits naturally into an everyday carry (EDC) setup and feels intuitive, modern, and easy to use
- Fast & Accurate Indoor Measurements with Class 2 Laser: Measure distances from 0.16 ft to 98 ft with up to ±1/16 in / ±2 mm accuracy. With quick measurement response in about 0.2 seconds, HOTO helps you check spaces efficiently for home renovation, furniture layout, moving, decorating, craft projects, and DIY planning. Built with a Class 2 laser for everyday indoor measuring; use as directed and avoid direct eye exposure
- Low-Power OLED Display & USB-C Rechargeable Convenience: The low-power OLED display provides clear indoor readings while helping reduce battery drain. With USB-C rechargeable design, auto shut-off, and up to 1000 measurements per charge, this digital laser measure is built for repeated daily use without frequent battery replacement. Compact enough to keep in a drawer, toolbox, bag, or pocket
- Useful for Home, Work & Everyday Projects: From home renovation and furniture measuring to room planning, real estate checks, interior design, and light construction projects, this pocket-size laser distance measure is made for practical everyday use. Compact enough to keep in a drawer, toolbox, bag, or pocket, it is a stylish measuring tool that feels just as giftable as it is useful
Data overwriting occurs when new data is written to the same physical location on your storage device where a previously deleted file’s data resided. Once overwritten, the original data is destroyed and becomes unrecoverable by conventional means. This is why it’s crucial to stop using the affected drive immediately after accidental deletion.
Q4: Does the Recycle Bin have a size limit?
Yes, the Recycle Bin does have a configurable size limit. Once this limit is reached, Windows will automatically delete the oldest files in the Recycle Bin to make space for newly deleted ones. You can adjust this limit by right-clicking the Recycle Bin, selecting “Properties,” and configuring the “Custom size” for each drive.
Crashes, No Sound, or Screen Glitches?
Random freezes, missing sound and display glitches usually trace back to one bad driver. Find and replace yours safely.Free scan · under a minutePC Slower Than It Used to Be?
A free scan shows the junk files, broken settings and background clutter dragging Windows down - then fixes them in one click.Free scan · Windows 10 & 11Q5: Can I recover files from a formatted hard drive?
A5: Recovering files from a formatted hard drive is more challenging than recovering simply deleted files, but it’s often still possible, especially with a quick format. Third-party data recovery software is typically required for this. A full format, however, might make recovery much more difficult or impossible as it can overwrite more data.
Q6: Why do I need to save recovered files to a different drive?
You must save recovered files to a different drive than the one you are recovering from. If you save them back to the source drive, you risk writing new data onto the very space where the deleted files are still residing, potentially overwriting and permanently destroying the data you are trying to recover.
Q7: What is TRIM and how does it affect SSD data recovery?
TRIM is a command used by Solid State Drives (SSDs). When you delete a file from an SSD, the operating system sends a TRIM command to the SSD controller, telling it that those data blocks are no longer in use. The SSD then internally wipes those blocks to maintain performance. This means that data deleted from an SSD with TRIM enabled is often permanently erased very quickly, making recovery significantly harder or impossible compared to Hard Disk Drives (HDDs).
More shopping ads
Product prices and availability are accurate as of the date/time indicated and are subject to change. Any price and availability information displayed on Amazon at the time of purchase will apply.
Independent reader supportYour contribution helps us test, update, and keep practical guides available for everyone.